Workout With Dumbbells - Workout Program
Workout with dumbbells
Assuming 3 sets per exercise, if you perform the workout easily, you should increase the weight next time. In contrast, if you can't perform the movements cleanly and the weight is too heavy, for example, you must gain momentum to reach the final position.
Set 1: Light weight for weighted muscle sets
2nd: Moderate weight
3rd: The highest possible weight. You give everything and try to reach the limit -

9 reps with dumbbell exercises
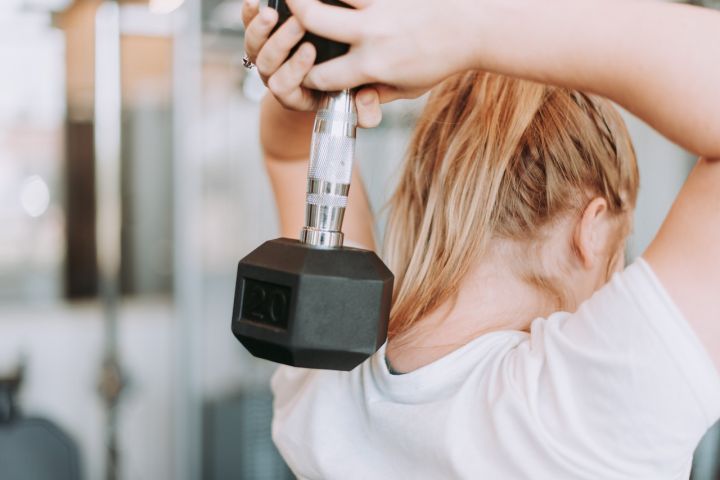
Safety first: Warm up
Warming up before every workout is an absolute must. This ensures that your cardiovascular system starts moving and keeps your muscles warm. This, in turn, prevents injury during (long-term) exercise.
You can easily run for 5 minutes or jump rope on the spot. Then go on the spot for 1 minute and rotate your shoulders back and forth.
Dumbbell exercises: 1 - flying bird
Anyone who has spent time in the gym will know the butterfly device exercise. The dumbbell workout is not intense. The focus of this exercise is to strengthen the large pectoral muscles.
Step 1: First come to the starting position. To do this, hold the dumbbells in each hand and lie with your back on a flat bench, bench or similar. Your arms are extended vertically to chest height. Make sure your arms are always slightly bent (to ease the elbow joint) and not fully extended, with the backs of your hands pointing toward your head. Your feet are placed on the floor with your legs bent. Your lower back should be slightly bent inward.
2. Bird of prey: Now follow the flight (also called "Bird of prey"). During the inhale, lower the dumbbells toward the bench, opening the chest and shoulders farther out. It only changes the position of the arms! In the final position, the dumbbell is roughly the same as your upper body (not down). As you exhale, you bring the dumbbells back together.

Training goal: Primary strengthening of the large pectoral muscles, followed also by the front of the shoulders
Repetition program: 3 - 12 repetitions of 3
Dumbbell exercises: 2 - lateral raises
Lateral raises are a classic in muscle building training and are used to strengthen the middle part of the shoulder muscles, making them a popular form of exercise.
Step 1: To begin you will reach the starting position. You stand up straight with your knees slightly bent and the dumbbells covered by your hands. The dumbbells are held close to your body with the palms of your hands facing each other.
Step 2: The next step raises the dumbbells sideways without lifting your shoulders. You are working without power, but the movement is slow and controlled. In the final position, the dumbbells are at approximately head height, then slowly lower back to the starting position.
Tip: You can also perform the movement seated or on your knees.

Training goal: Strengthen the middle deltoids (shoulder muscles) as well as the rear and front deltoids
Repetition program: 3 - 12 repetitions of 3
Dumbbell exercises: 3 - reverse flyes
The next exercise resembles the sequence of movements for the side raises, hence the name lateral bend. By bending the upper body, you will achieve a different angle than when lifting to the side. The result is that the muscles behind the shoulder girdle in particular are strengthened - so the focus is more on strengthening the back.
Step 1: You start the exercise in the starting position. To do this, you position yourself hip-width, bending your legs and upper body slightly until it is almost parallel to the floor. Make sure your back stays straight (no hollow back or round back) throughout the exercise. Cover the dumbbells with your hands and keep them near your knees in front of your body, with your arms almost extended and palms facing each other.
Step 2: As you exhale, move the dumbbells up and down on both sides at the same time. The shoulder blades come together in the movement, which is the end point. You will hold in this position for a moment, then you lower the dumbbells to the starting position with a slow and controlled movement.
Important note: Round backs or hollow crossovers should be avoided at all costs - your body will remain tense throughout the movement.

Training goal: Strengthen the back
Repetition program: 8 - 12 repetitions 3
Dumbbell exercise: 4 - bicep curl moment
Bicep curls are most commonly seen with barbells - a workout available in every gym because for many people, impressive biceps are the epitome of athleticism. The same exercise as the dumbbell is effective with the barbell, but by no means.
Step 1: First, the starting position is important. To do this, you hold the dumbbells with both hands, upright in a hip-width brace. The abdominal muscles are tense during the exercise, the vision is forward and the shoulders are pulled back.
The right arm position is important: You grab the dumbbells from below so that your thumbs point to the sides and the palms of your hands point forward.
Step 2: Now follow the curl by bending your forearms and lifting the dumbbells up toward your shoulders. Only your forearms are moving, your upper arms stay firmly in place and don't move during the movement. The downward motion is slow and controlled: You don't let your arms sink, but lower your forearms in a controlled manner. Your biceps are now resisting the weight of the dumbbell.
Important note: The movement depends entirely on the strength of the biceps. You won't be able to pick up the dumbbells with the help of your arm muscles - only your biceps will work!

Training goal: Strengthen biceps and arm flexors
Repetition program: 10 - 12 repetitions of 3
Dumbbell exercises: 5 - tricep ascending reverse flexion
Because training the triceps that are there makes the upper arms look tight, the troublesome part of many women disappears. In the variant we are going to present to you, you press your arms overhead.
Step 1: For effective triceps curls (also known as overlays), the correct starting position is important. Exercises can be performed while standing or sitting - but sitting makes it easier for you to fall into skeletonized back (to avoid dips)! You stand/sit up straight and your feet are pressed into the ground. If you are sitting, the angle between your thighs and calves should be about 90°. Now grab a dumbbell with both hands and extend your hands upwards (slightly bent at the elbows) until the dumbbell is overhead.
Step 2: The coating now follows closely behind. To do this, lower your forearms (not your upper arms!) slowly, in a controlled manner towards your upper back. Your upper arms are not moving and your elbows continue to point forward rather than to the side. From this final position, you push your arms back from the starting position with the force of your triceps muscles. Then you repeat the exercise.

Training goal: Strengthen the triceps
Repetition program: 8 - 12 repetitions of 3
Dumbbell exercise: 6 - shrugs
Also known as shoulder lifts, this exercise is particularly appealing to those interested in the "Bull's tail". A bull's neck is nothing more than a hood muscle. Once again, this muscle is found in a place where it can easily be derived from the name.
The exercise is simple but effective: One dumbbell in each hand, lift your shoulders - that's it.
Tip: Due to the small range of motion, but strengthening large muscle groups, a larger weight is required for execution. Only then will the exercise be effective.
Step 1: Step 1 is the starting position. To do this, stand on a hip-width stand and hold the dumbbell in one hand. Keep the dumbbell to the side of your body on your thighs with the palm of your hand facing inward. Your shoulders are pulled back slightly, with your eyes directly in front of you.
Step 2: Now follow the shrug by lifting both shoulders at the same time (imagine pretending to shrug your shoulders). Hold in the final position for a moment before you lower the dumbbells to the starting position.

Training goal: Strengthen the hood muscles and scapular lifters
Repetition program: 10 - 12 repetitions of 3
Dumbbell exercise: 7 - one-arm prone row
For many, a broad back is the epitome of a trained body. The one-arm, pre-bent row is a back training classic that allows you to train each side of the body individually.
Tip: It's also possible to use two dumbbells at the same time for preventative rowing - but by leaning on a bench, you can more easily assume the correct position and stay in it for the duration of the workout.
Step 1: In addition to this, you will need a seated position to perform the exercise next to the dumbbells, such as a flat bench or a regular workbench that you can support yourself on. Place the dumbbells in the center of the bench and place your left knee and lower left leg on the lower end of the bench. You then bend your upper body upward and support your shoulder height on the bench with your left arm. Your back is now in a straight position. You then use your right arm to include the dumbbell and pull him up next to the bench.
Step 2 is the rowing. To do this, bend your elbow to a position close to your upper body and pull the dumbbell upward out of the back muscles. In the final position, the elbows are parallel to the upper body. Then slowly lower and repeat the exercise in a controlled manner (8-12 repetitions).

Training goal: Strengthen the large back muscles, biceps and obliques
Repetition plan: 8 to 12 repetitions per set 3 repetitions
Dumbbell exercises: 8 - steps
Tight legs and defined glutes are a training goal for many people. Dumbbell steps (also known as dumbbell climbers) are a great way to get closer to these goals in combination with proper nutrition.
Important note: As another piece of equipment, a sturdy bench or box, a flat bench or seat is required. However, make sure you choose an object at a height so that the upright thighs are roughly parallel to the ground.
Step 1: Starting position. To do this, you hold a dumbbell in each hand, upright in front of the seated position. Your upper body is a light hollow cross, and your shoulders are pulled back slightly.
Step 2: Now follow the steps. You place one entire foot on the raise. Then you transfer your weight to your rear leg and firmly tighten your gluteal muscles. From the strength of the rear leg, you step on the bench and you only pull the rear leg. At the top you set the second foot. Then repeat the movement in reverse order until you return to the ground.
Increase the difficulty: Advanced can increase the difficulty of the workout and build small endurance workouts in the workout by performing dynamic jumps at the highest point. However, it is very important that the bank or similar bank it is stable and cannot topple over.

Training goals: Strengthen primarily the gluteal muscles and the back of the thighs, next to other muscle groups such as the front of the thighs, calf muscles, etc.
Repetition plan: 3 to 6 repetitions per group 3 times
Dumbbell exercises: 9 - push and pull
A very challenging exercise: Finally, we would like to introduce you to a very demanding exercise: Push & pull combining tight push-ups and single arm rowing. In addition, you are in a push-up position during the entire exercise, training several muscle groups at the same time. This exercise can simply be called a total body workout.
Important note: Due to its complexity, this exercise is only for advanced users.
Step 1: Start with you in the push-up position. That's your starting position. To do this, place your hands under your shoulders and lift your knees until your body forms a straight line from your feet to your head. Only your hands and feet touch the ground. Tummy is tight. The view is pointing toward the floor. Two dumbbells are placed approximately under your chest.
Tip: Joints are more comfortable when exercising on a gym mat. Also, the dumbbells on the surface should not slide.
Step 2: Perform a one-arm row from this position. You bend one arm and pull the dumbbell toward the side abdominals. The weight is transferred to the other arm and your upper body does not roll over, but stays in a straight line. Then slowly lower the dumbbell in a controlled manner to the floor and place it on the exercise mat.
Step 3: Follow the push-ups closely. To do this, you can slowly lower your body in a controlled manner by bending your arms in the elbow joints. In the final position, you are a few inches off the ground. You then push yourself back into the push-up position from the strength of your triceps and repeat step two.

Important note: You are performing emergency push-ups here to strengthen the triceps. The difference with extensive push-ups is that you always move your elbows closer to your body, moving them up the body, so to speak, in order to maximize your triceps.
Training goals: Back muscles, primary strengthening of the large pectoral muscles and triceps, secondary strengthening of the abdominal and biceps muscles